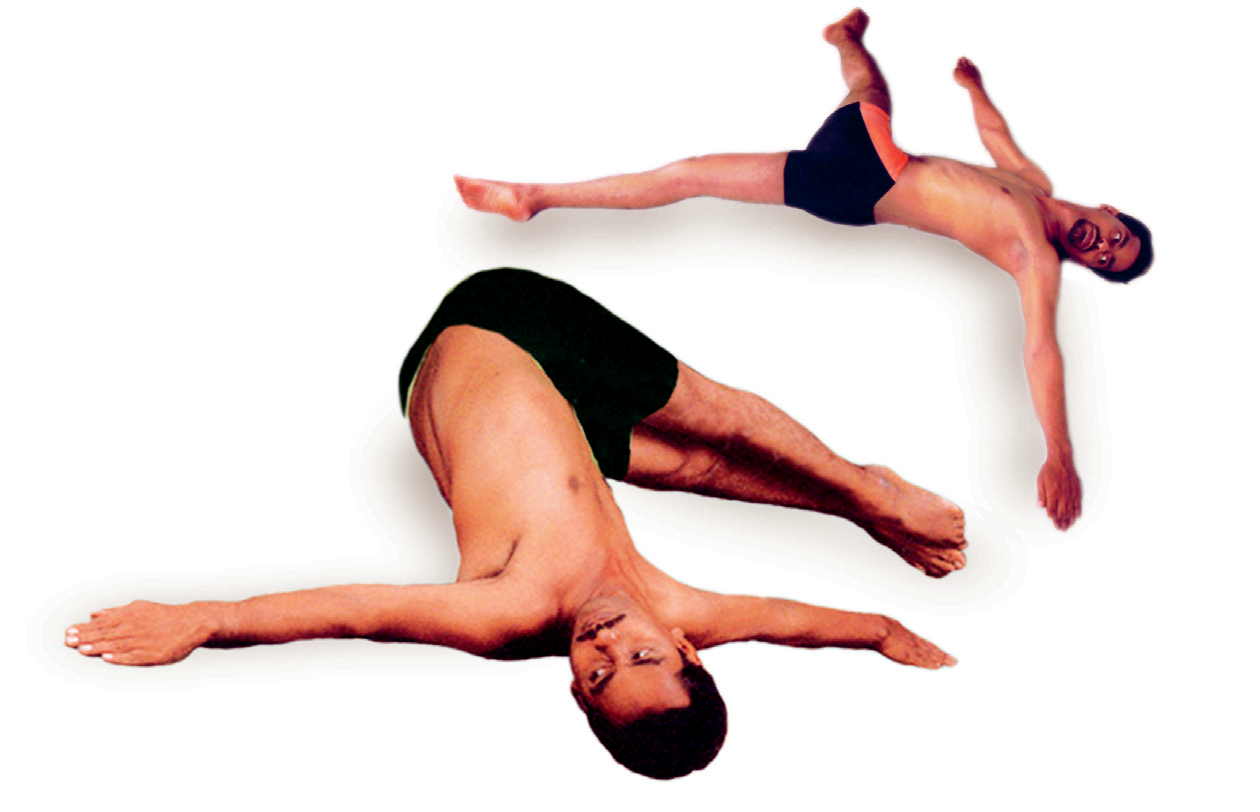
Jathara Parivartanasana to Reduce Stiffness in the Hips!!
The cure to all problems whether it is physical, mental or spiritual, is yoga. Right from the Vedic age’s yoga has always occupied a special position. Initially it was practiced by only a handful of selected people. But gradually as its benefits came to be known, more and more people started to include it in their daily routine. The benefits of yoga are multifold.
Over a period of time many variations of yoga have evolved. Finding which one is suitable for you is important before you attempt it. Because not all the yoga poses are suitable for everyone. So, consult a trainer before you embark on the asanas.
The name in Sanskrit is derived from three words – ‘Jathara’ meaning ‘belly’ or ‘abdomen’, ‘Parivarta’ which means ‘moving or twisting’ and ‘asana’- ‘pose’. So it comes to mean the abdomen or belly twist. The benefits of this asana are:
- Reduces stiffness in the hips
- Improves digestion
- Promotes better blood circulation throughout the body
- It will help you to get rid of your emotional fatigue after a tiring day
- Brings balance to your body and mind
- Brings elasticity and flexibility to the spine
- Releases tension accumulated in the lower back
This asana is a relaxing yoga position which helps relieves the stress and tension from your body. To perform this asana, follow the instructions mentioned below:
- Lie on your back on the floor, stretch your legs straight out
- Now, stretch your hands on your sides at shoulder height forming the structure of the letter ‘T’. Face the palms down.
- Now while exhaling, drop both your feet over to the left side of your body. Do this while twisting the spine and low back. Also remember to slide the feet as close to the left arm as it is possible.
- As you drop your feet to the left, turn your head to the right, forming a good twist at the trunk.
- Stay there for few seconds, as you inhale bring the legs back up to the center, and as well as the head.
- Now, do the same thing on your right side. While you do this, exhale, while lengthening your spine at the same time.
- Keep your shoulders flat to the floor and close your eyes and try to relax in this pose.
- Repeat the pose to the left and right side for few times as your strength permits
- At the end, slowly drop your feet to the front forming the T shape again
- Then bring your hands back, and rest them next to your body
- Be there for few seconds to relax the body
Do not do this asana if you have recently injured you knees hips or back.
The main anatomical focus of this asana is upon the back, shoulders, spine, chest, hips and lower back. If you can properly practice this asana on a regular basis then it will aid in stimulating these specific parts of the body and also remove any stiffness from these parts completely.

